Remove Names and Personal Details From Video Audio
Remove spoken names and personal details from creator videos. Choose a mute, cut or new recording, edit the right audio tracks, and check the finished export.
You can remove a spoken name or personal detail by isolating that passage in your video editor and muting it, cutting the moment, or recording a new explanation. Keep the rest of the sound when it still helps the video. If two voices overlap in the same recording, replacing the affected phrase may be more practical than trying to separate them. Export a new file and listen to it before publishing.
Illustrative scene: headphones and a desktop microphone sit beside a laptop and closed notebook. Set aside time to listen to the finished video, including the moments around each audio edit.
Listen for the information you don't want to publish
Start with the video you intend to edit, with sound on. Listen once without concentrating on the picture. Note the beginning and end of anything you want to remove: a name called from another room, an address in a conversation, a workplace mentioned in an aside, or a personal reminder read aloud.
Write the time and a short description in your editing notes. You don't need to copy a full address into a filename to remember where it appears. “Personal interruption, around 00:12” is enough to find it again.
For example, imagine a paper-flower tutorial where someone off camera says, “Mira, your appointment is at Brook Lane.” Muting only “Mira” would leave the appointment and place in the video. Select the interruption you don't want viewers to hear, rather than treating every name as a single isolated word.
A transcript can help you find a passage, but listen to confirm its boundaries. Audacity's audio-selection guidance recommends checking the sound at both edges of a selection; the drawn waveform, a picture of the sound's changing level, doesn't tell you the words by itself.
Choose a mute, a cut, or a new explanation
Use the smallest edit that removes the information and leaves the video understandable. A pause while your hands keep folding paper may be fine. A missing instruction about where to put the glue needs a different fix.
| What happens in the recording | A useful first choice | What to check afterward |
|---|---|---|
| A private interruption occurs during a visually clear action | Mute the whole interruption | The action still makes sense without those words |
| The entire moment is unnecessary | Cut the picture and sound together | The next shot and later sound stay in sync |
| A personal detail is part of an essential explanation | Record a new sentence without it | The replacement explains the same action accurately |
| Private speech overlaps your instruction on one recording | Replace the affected explanation or retake the shot | No fragment of the other voice remains |
| You don't need any original sound | Remove or mute all original audio | Every remaining sound source is intentional |
A bleep can make a deliberate interruption clear to the viewer, but mute the underlying speech before adding it. Putting music or a louder effect over a name leaves that speech in the mix. Choose silence when an attention-grabbing sound would interrupt the lesson, and a new sentence when the lesson needs the missing information.
If the video is meant to work with no sound throughout, use the separate silent-video guide. The steps here are for a clip where you want to keep useful sound around the edit.
Give the edit enough space around the words
Zoom into the timeline and replay the passage. Start the mute before the first sound of the private phrase and end it after the last sound. Leave enough space to include a quiet ending or an echo; don't use a fixed number of seconds for every recording.
Listen from a little before the selection through to a little after it. If you can still hear a syllable, widen the edit. If that removes part of a useful instruction, decide whether a new sentence would be clearer than a tightly clipped word.
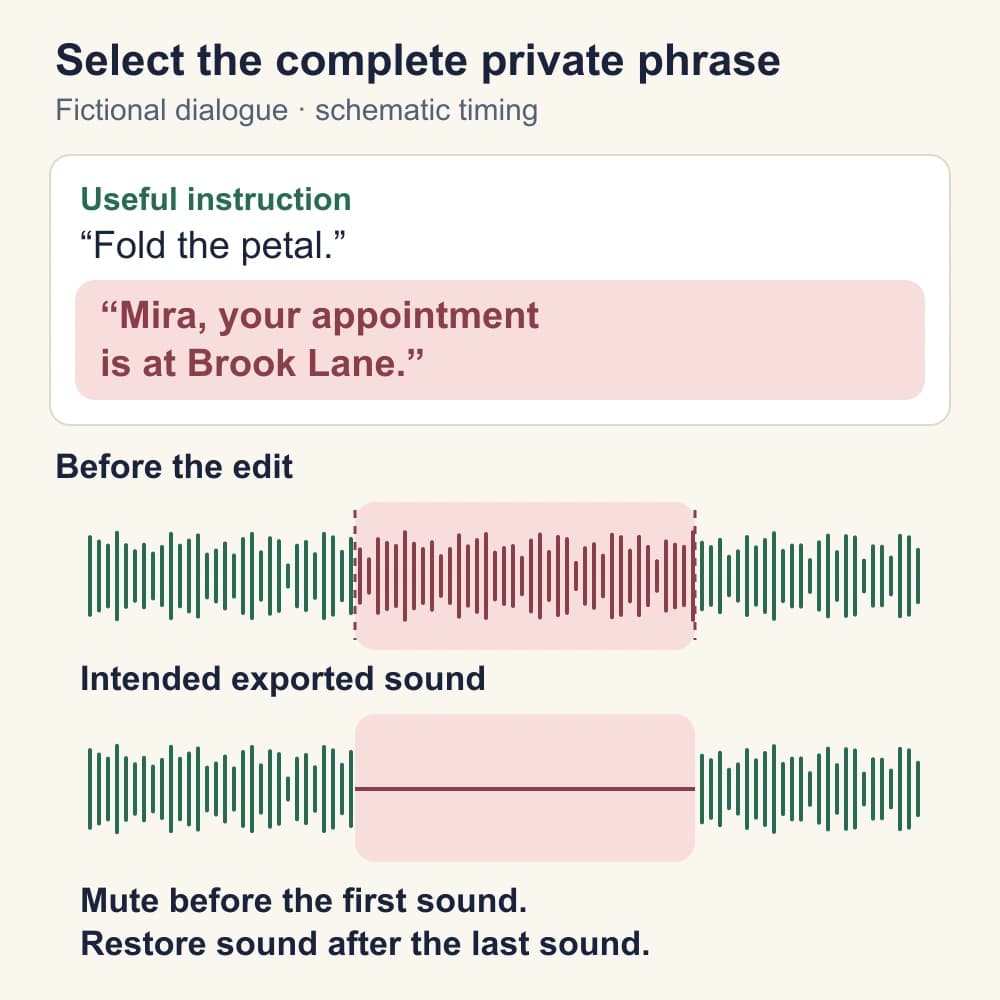
Keep the remaining audio in its original position when you're muting a passage. Sliding later narration left to close an audio gap can make it describe the wrong action on screen. If you want to shorten the video, cut the matching picture too and replay the join.
Mute a passage in Clipchamp
In Clipchamp, you can split the video around the passage and mute the middle clip. That keeps its picture on screen while you work on the attached sound.
Following Microsoft's split instructions:
- Add the video to the timeline and select it.
- Move the playhead to just before the private passage, then use the scissors Split button. The S shortcut also splits the selected clip.
- Select the remaining section and split again after the passage. You now have a middle section you can edit separately.
- Select that middle section and use its speaker icon to mute it. Microsoft's mute instructions show the icon changing to a crossed-out speaker.
- Play across both joins. Keep the middle video section in place if you want the picture and total duration unchanged.
Microsoft's examples use personal accounts; the same principles apply to work and school accounts. Use the audio control on the clip, rather than your computer's volume button.
If you're working with detached audio, make the splits on that audio clip and mute the isolated section. Clipchamp's Audio > Detach audio creates a separate timeline clip and downloads an audio file to your computer. Keep that downloaded original out of the folder you use for finished delivery copies.
Edit the sound separately in iMovie on iPhone
For an iPhone edit, detaching the sound lets you isolate the unwanted passage while leaving the video intact. Apple documents both detaching and splitting audio in a movie project:
- Tap the video clip, open Actions, then tap Detach. Its audio appears as a blue clip beneath the video.
- Position the playhead before the private passage. Select the blue audio clip, open Actions, and tap Split.
- Move past the end of the passage and split the remaining audio again.
- Select only the middle audio section. Open Audio and tap Mute beside the volume slider, as shown in Apple's audio controls.
- Replay the passage and check that the other audio sections still line up with the picture.
You can add a replacement explanation separately if silence leaves the viewer missing a step. Mute the old passage before recording over it, and listen to the replacement for the same details you removed from the original.
On a Mac, you can adjust just a selected range
In iMovie on Mac, hold R and drag across the part of the clip you want to change. Lower the horizontal volume line in that selection to silence. Apple's range-volume instructions explain that iMovie adds fades at the selection's edges.
Allow those fades to finish before the private words begin and start restoring the sound after they end. If the range is too tight, part of the phrase may remain audible as the volume changes. Listen across the full transition, rather than checking only the middle of the quiet section.
Check every recording of the same moment
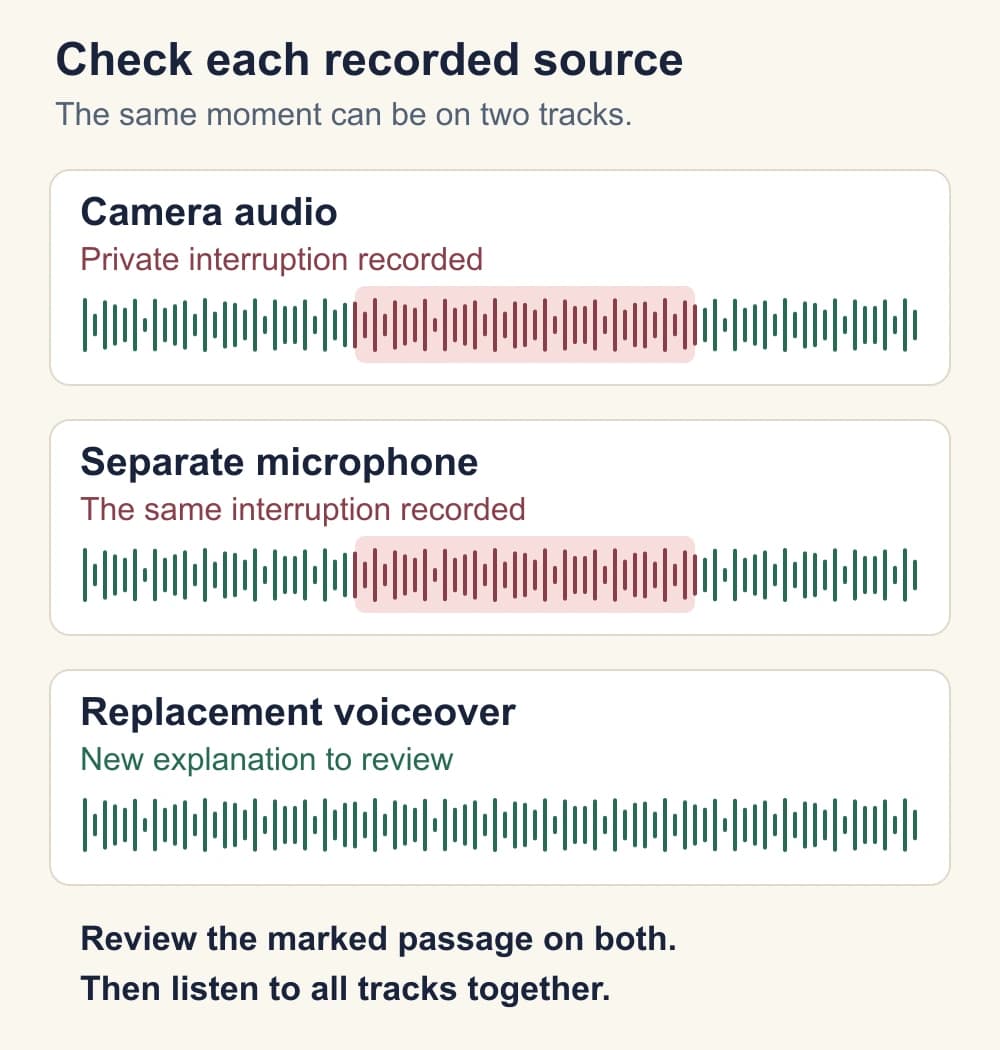
A video may contain camera sound, a separate microphone recording, music, and a later voiceover. If a private interruption was captured by both the camera and microphone, muting one recording leaves the other to check.
Look at each sound source playing during your marked passage. Listen to them separately when your editor allows it, then together. Keep any music or replacement narration you want, but remove the private words from every recording that contains them.
If two voices are mixed into one recording, don't assume a speaker-separation or noise-removal tool has removed all the unwanted words. Listen to whatever it produces. If the interruption is still understandable, replace the whole passage or retake it.
This is also separate from disguising the sound of your voice. A pitch change doesn't remove a spoken address. The guide on whether to use your voice as a faceless creator helps with that broader presentation decision.
If you also want to anonymize your face, the NeoFace walkthrough describes selecting a synthetic face, uploading prerecorded video, reviewing the result, and downloading it. Plan the spoken-detail edit separately, and listen to the file you ultimately prepare for publication. Face anonymization doesn't establish that a private conversation has been removed.
Export the corrected video and listen outside the editor
Save the finished video as a new export. In Clipchamp, use Export, choose your resolution, and save the resulting MP4, following Microsoft's export instructions. Saved project edits and a finished video are different things; opening the original camera file won't show your timeline changes.
Open the export in a player with your device sound enabled. Listen at a comfortable, audible level through each marked passage, including its beginning and end. Then play the full video so repeated details elsewhere aren't missed. Watch the edited moments too: a missing word shouldn't leave a confusing demonstration or a visible private detail.
Update captions and transcripts from the corrected recording. Our caption and transcript guide covers separate subtitle files, text burned into the picture, and published caption tracks. A new audio export doesn't update an old subtitle file or an existing post by itself.
If you've already published the original, review that post's audience or removal options while you prepare the correction. Apply the correction to teasers and other versions that use the same passage. Don't label an old cut as approved just because the longer video has been fixed.
Before you publish the audio edit
- You've listened through the recording and marked each private phrase.
- Each edit covers the complete detail, with its opening and ending sounds.
- Every track that recorded the passage has been checked.
- Any bleep or new narration follows removal or muting of the original speech.
- Useful instructions remain understandable and match the picture.
- You've opened and listened to the new exported file with device sound enabled.
- Captions, transcripts and shorter versions match the corrected recording.
- The file selected for upload is the reviewed export.
Use the final video privacy checklist to review the picture, cover and other parts of the release once the sound is ready.
Frequently asked questions
- Can I remove a spoken name without muting the whole video?
- Yes. Split the audio around the complete spoken detail and mute that section, leaving the rest audible. If the name overlaps useful speech on the same recording, you may need to replace the whole phrase or record that explanation again.
- Is putting a bleep over a name enough?
- Mute or remove the original speech first, then add a bleep if you want one. Adding another sound alone leaves the original speech in the mix. Listen to the exported result, including both edges of the edit.
- Can I remove a background conversation and keep my narration?
- If they were recorded on separate tracks, edit the unwanted track and check the others. If both voices share one recording, do not assume a separation tool will remove every word. Re-recording the affected explanation gives you a replacement you can inspect.
- Why can I still hear the name after muting a clip?
- Check for another recording of the same moment, such as camera audio beneath a separate microphone track. Also confirm that the mute covers the full phrase and that you opened the new export with your device sound enabled.
- Does a voice changer remove spoken personal information?
- Changing how a voice sounds does not remove the words it says. Edit the name, address or other detail out of the recording separately.
- Does exporting a corrected video fix a post I already published?
- No. A new export is a separate file. Review the existing post and its available visibility or removal controls, then publish the corrected version as appropriate. Check its captions and any shorter clips made from the old recording too.
Stand Out While Staying Anonymous
Join thousands of creators building faceless brands with Neoface. Private by default, lifelike by design.
No credit card required · Instant access · Free plan available