Redact Personal Information in Screenshots Before Sharing
Redact names, emails and account details in creator screenshots. Choose a crop or solid cover, use built-in tools, and check the saved image before sharing.
- screenshot-privacy
- creator-safety
- redaction
- identity-separation
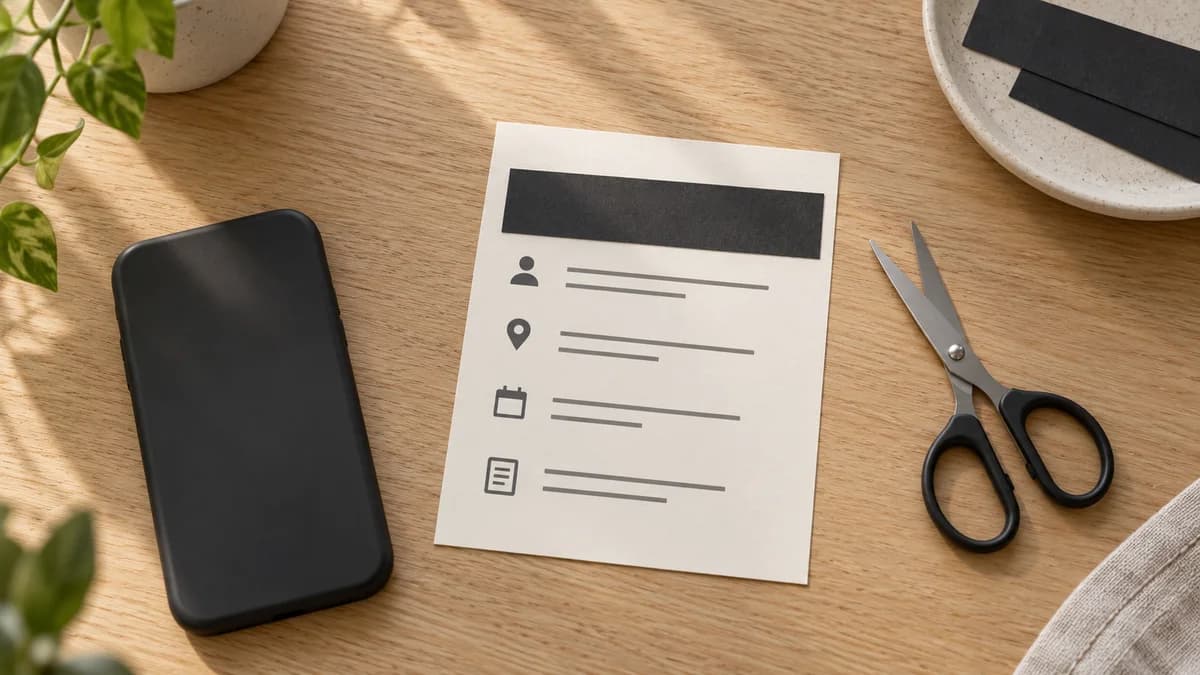
To redact personal information in a screenshot, crop away anything the viewer doesn't need and fully cover the private details that remain. Use an opaque shape or a suitable redaction tool, then save and reopen a separate finished image. Check the entire picture before sharing, including account photos, repeated names and the edges of each cover.
Redaction means removing or concealing information in the copy you're sharing. For a creator, that might be the personal email above a tutorial, a customer's name beside a project, or a small profile photo that connects a creator account to a personal one. You can usually keep the useful part of the screenshot without publishing those details.
Illustrative scene: a solid paper strip covers a sample card's header while leaving the lower lines visible. The image illustrates the choice; it isn't an app screenshot.
Decide what the screenshot needs to show
Write the reason you're sharing it in one sentence. “Show where the caption setting is” needs a different picture from “Show the error that appears after export.” That decision tells you which parts to keep.
If you can repeat the screen with fictional material, do that before editing a capture of private work. Open a sample project, give it a neutral title and use content you have permission to publish. A settings explanation doesn't need a real conversation or a list of customer orders behind it.
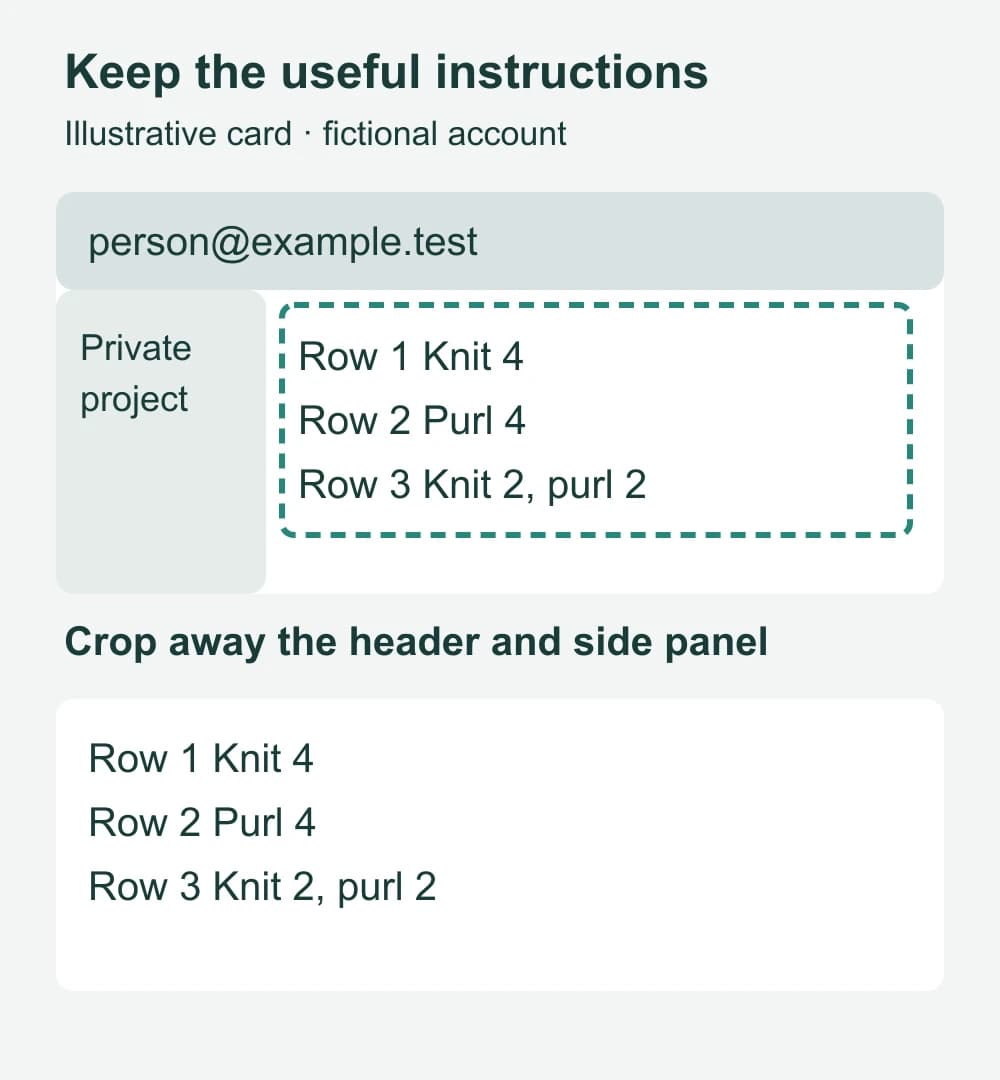
For example, a knitting creator might want to show the row where a pattern becomes confusing. The stitch instructions matter; the personal account header and unrelated project sidebar don't. Crop to the relevant instructions, leaving enough of the row labels for someone to understand the question.
If the image records a real problem, keep the part that demonstrates it. Don't replace the error or alter an amount and then present the picture as the original result. You can label a simplified example as sample data, or cover unrelated details while retaining the genuine issue.
For a video tutorial, prepare the screen before recording rather than treating each frame as a screenshot. The screen-recording privacy guide covers menus, notifications and information that appears as you move through a task.
Choose between a crop and a solid cover
Use a crop when the private material sits outside the useful area. Use a solid cover when a detail sits inside an area you need to keep. If those edits make the picture difficult to understand, recapture a simpler example.
| What the screenshot contains | Useful choice | What to inspect |
|---|---|---|
| Personal tabs or a sidebar beside the lesson | Crop them out | The crop still includes the relevant controls |
| An email inside a settings panel | Fully opaque cover | The whole address, including its ends |
| The same name in a header and message | Cover each appearance | No second copy remains elsewhere |
| A QR code or barcode beside an order | Crop or cover the entire code | No uncovered code region remains |
| A private profile picture | Crop or fully cover it | Other account labels are checked too |
| Many private rows around one useful result | Use a smaller capture or sample | The result remains understandable |
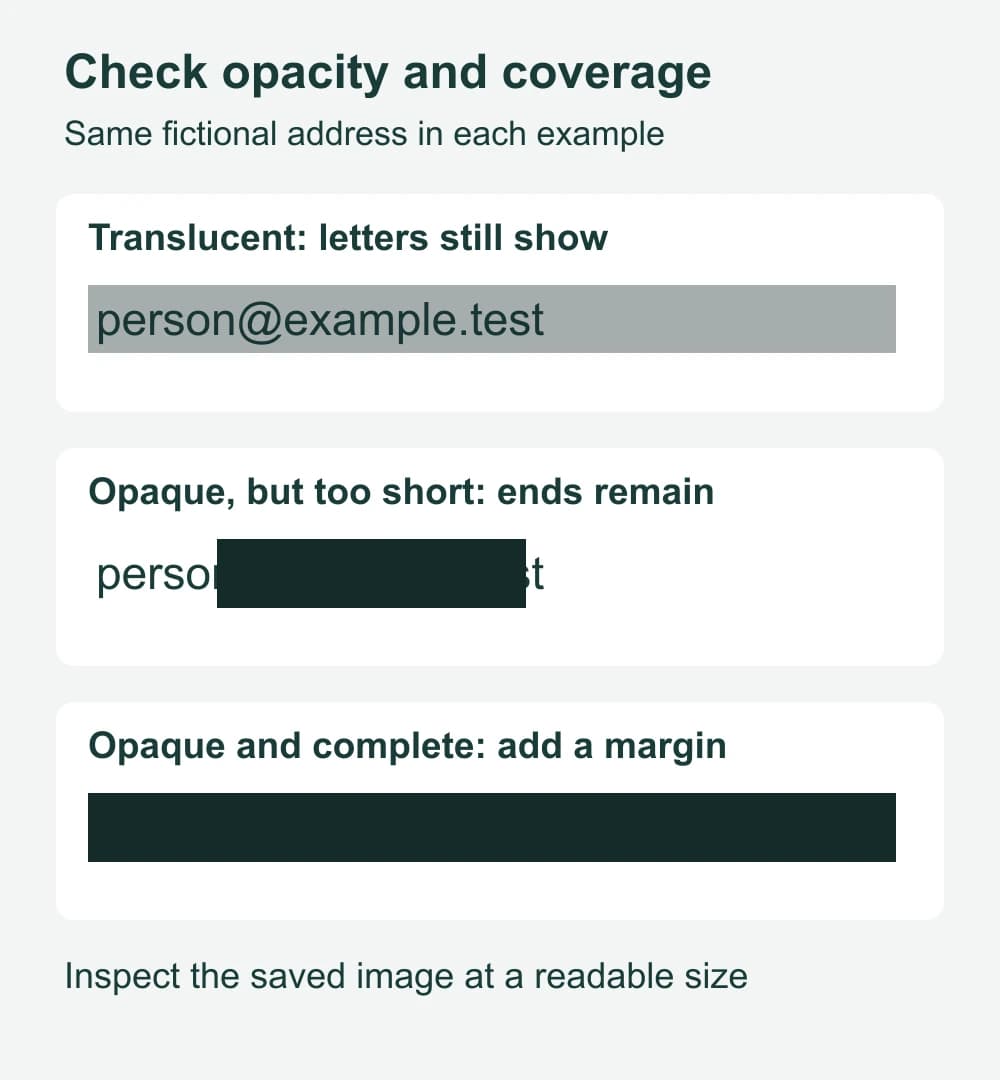
For text you need to keep private, choose a fully opaque cover instead of a soft blur or a translucent highlighter. “Opaque” means you can't see through it. A dark-looking mark can still contain visible letters if it has partial transparency; a thick outline leaves the middle untouched.
Cover the whole detail with a little space around it. A box that hides the center of an email but leaves the first name and domain visible still reveals information. Look closely at tall letters, punctuation and any line that wraps underneath.
Check codes as whole objects, too. Don't cover only the printed digits below a barcode while leaving the bars visible, or hide a label beside a QR code and overlook the code itself. If the code isn't needed for the explanation, remove it from the shared picture.
Redact a screenshot on iPhone with Markup
Apple's Markup instructions show how to open a photo, choose Edit and enter Markup. Work on a copy if you need to keep an unchanged capture for your own records.
- Open the screenshot in Photos, choose Edit, then Markup.
- Tap the Add button and choose Add Shape, then a rectangle.
- Select a solid fill and full opacity. Check that you're changing the fill inside the shape, rather than only its border.
- Move and resize the rectangle to cover the complete detail with a small margin. Add separate rectangles for other details.
- Zoom in to inspect the covers, then finish the edit with Done and save it.
Apple's shape controls include fill color, opacity and resizing. The arrangement can vary with the app and software version. If you can't confirm a solid fill, use the desktop method below rather than guessing from the tool's name.
Reopen the saved image before choosing it in a posting app. Check that it shows the completed edit and that you selected the intended copy. If your transfer includes the original image or its editing information, prepare a separate finished export; the edited-photo delivery guide explains that file choice.
Use desktop tools when the details are small
A larger screen helps when several details need individual covers. Keep the original capture private and name the finished copy clearly, such as pattern-question-redacted.png.
Windows: Snipping Tool
In the current Windows Snipping Tool, open your capture and choose Text actions, then Quick redact for email addresses and phone numbers. Microsoft's Snipping Tool help describes those controls and Save as for an additional copy.
Treat that as one part of the edit. A name, account photo or street address still needs your attention. Look for missed text and use an opaque cover or a tighter crop where needed. If your version lacks the documented control, use an image editor with a solid filled shape.
Mac: Preview
Open a copy of the screenshot in Preview and show the Markup toolbar. Choose a rectangle from Shapes, position it over the detail, and set Fill Color to a fully opaque color. Inspect the whole box, including its middle and edges.
Apple's Preview image-annotation guide distinguishes the border color from the fill inside a shape. It also notes that annotations on an image can't be moved or deleted after saving. For a PDF, use a document-redaction tool and apply its redactions; Adobe's PDF redaction instructions explain that separate task.
Use File > Export to make a separately named PNG, following Apple's image-export instructions. Close the editing view and reopen that file for your final check.
Android or another editor
Android screenshot editors vary by phone and app. Look for a filled rectangle and an opacity control, or use a crop. Confirm what the selected tool does on a harmless sample before covering private information. If it offers only freehand strokes or blur, use an editor where you can clearly set a solid fill, including one of the desktop options above.
You don't need to install an unfamiliar app simply to cover an email address. Start with a tool you already understand, and check the saved result rather than relying on a label such as “privacy” or “redact.”
Check account pictures and repeated details
After the obvious email or name, scan the picture from top to bottom. Look at account menus, document titles, sidebars, message headers, signatures, notification banners and the browser address bar. A name can appear in more than one place.
Small pictures deserve their own decision. If a personal avatar has no purpose in the screenshot, crop or fully cover it. Enlarging a tiny avatar for face processing adds work without helping the explanation.
If a tutorial needs a larger portrait example, prepare that image before putting it into the demonstration. The NeoFace face-anonymization workflow covers selecting a synthetic face, uploading a photo or prerecorded video, reviewing the result and downloading it. Use the reviewed photo in your sample project, then check the surrounding account details separately. Face anonymization isn't a text-redaction tool.
Include other people's information in the scan. A customer's handle or a collaborator's private message doesn't become suitable for public sharing just because you've hidden your own name. Use fictional conversation text for a teaching example when the actual exchange isn't necessary.
Save an image, then check that file
Finish the covers before exporting. If you're working in an editor with layers, flatten a separate delivery copy so the visible elements become one image. Adobe's flattening instructions describe how this combines visible layers and discards hidden ones. Keep any working project outside the files you're sending.
Flattening won't fix a translucent cover or an exposed edge. It combines the picture as it looks, so correct those problems first. The same applies if you make another screenshot of the edited view: any readable information in that view remains visible in the new capture.
Now open the exact saved file outside the editing session. Zoom in on each covered area and check the rest of the picture at a readable size. If you added arrows, explanations or an image description, make sure they don't repeat the private detail.
Visible redaction and embedded file data are separate checks. A PNG filename, image description or other field may need attention even when the picture looks right. Use the photo metadata checker guide for the finished file; don't assume screenshots have no metadata.
Review the post around the screenshot
Select the checked copy for upload and inspect the posting preview. Make sure a crop hasn't hidden the control you're explaining or made the remaining text too small to read. For a carousel, check each image individually.
Read the accompanying text as well. Covering a personal email in the image doesn't help if your caption repeats it. Describe the issue without unnecessary identifiers: “The export fails after I choose PNG” is usually more useful than naming the private project.
If you share a download link, check the sender details and folder contents separately. The creator file-sharing guide covers what a recipient can see around the file.
If you spot an exposure after posting, restrict or remove that post where possible and prepare a corrected copy. Check any reposts or alternate crops you control. An edited post can't recall an image someone already saved.
Before you share the screenshot
- The picture contains only the area needed for the question or lesson.
- Private text is completely covered with opaque fills, including wrapped lines and repeated appearances.
- Account pictures, QR codes, barcodes and unrelated messages have been checked.
- The useful controls and instructions remain readable.
- A separately named finished image has been reopened and inspected.
- The file's name, image description and metadata have been reviewed.
- The upload preview and accompanying text use the corrected copy without repeating private details.
Frequently asked questions
- How do I redact personal information in a screenshot?
- Crop out areas the viewer does not need, then cover remaining private details with fully opaque shapes or a suitable redaction tool. Include repeated names, account photos and codes in your check. Save a separate finished image, reopen it, and inspect the whole picture before sharing.
- Is a black marker enough to hide text on an iPhone?
- Black describes the color, not the coverage. Use a filled rectangle at full opacity, leave a small margin around the detail, and inspect the saved image.
- Does taking another screenshot fix a weak redaction?
- No. It records the visible picture, including any letters showing through a mark or around its edges. Fix the coverage first, and keep unrelated screen content out of the new capture.
- Will automatic screenshot redaction find every private detail?
- Do not assume it will. Windows Snipping Tool documents Quick redact for email addresses and phone numbers. You still need to check names, profile pictures, addresses, codes, filenames and repeated details yourself. Inspect what your particular tool covered before saving and sharing the image.
- Can I use the same method to redact a PDF?
- Use a document-redaction tool for a PDF, apply the redactions, and inspect the saved document separately. Drawing a box over a page is not a sufficient check of the underlying content.
Stand out while
staying anonymous.
Join thousands of creators building faceless brands with Neoface. Private by default, lifelike by design.
No credit card required · Instant access · Free plan available
- High-fidelity models
- Private and secure
- 24/7 support