Hide Your Face in Mirrors and Reflections in Photos
Hide reflected faces in creator photos with a crop, solid cover or reviewed repair. Check mirrors, windows and shiny props, then inspect the finished image.
- reflected-faces
- photo-privacy
- face-anonymization
- creator-safety
To hide your face in a mirror or reflection, find every reflected appearance in the photo and crop it out or cover it completely with a solid shape. If you need a more natural-looking repair, inspect the edited area closely before choosing that result. Treat the main face and each reflection separately, then reopen the finished image and check the exact copy you'll share.
A photo can show the back of your head while a dressing mirror shows your face. It can also hide your face behind a phone in one mirror and reveal a profile in another. Start with what the camera recorded, rather than how hidden you felt while taking the picture.
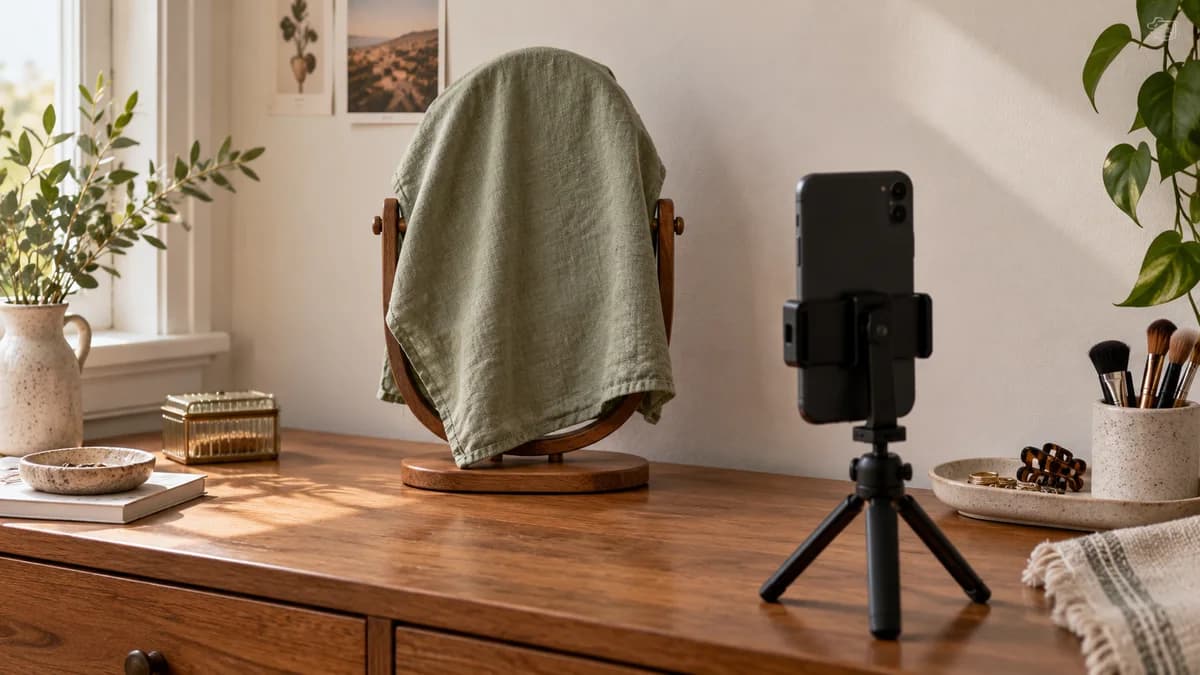
Illustrative scene: sage fabric covers a tabletop mirror beside a phone on a tripod. Covering an unnecessary mirror before taking the photo can save a later edit; check the camera's view for gaps.
Find the reflected faces before you edit
Open the original privately and look through the picture in sections. Check the main subject first, then each reflective surface. Enlarge the photo enough to see the small areas, especially a mirror near the edge or a dark window behind you.
Look at dressing mirrors, mirrored wardrobe doors, framed glass, dark screens and shiny props. Include objects you're holding: glasses, a compact mirror or a polished container may show a different view from the one in the background. You don't need to decide whether a tiny shape could identify you before removing an area that has no purpose in the photo.
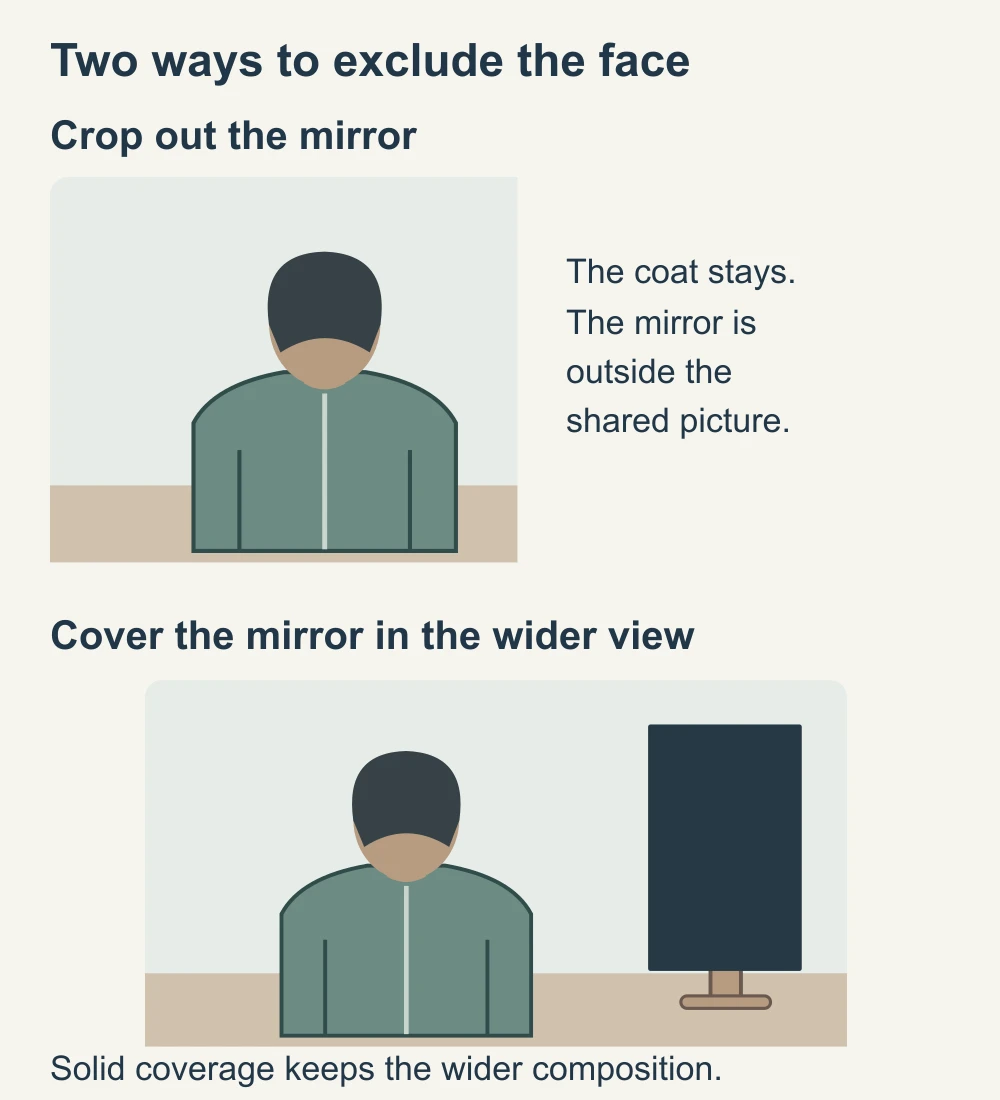
For example, imagine an outfit photo taken from behind. The coat is the subject, but a tabletop mirror beside your shoulder shows your face. Cropping the top of your head won't fix that second appearance. You need to crop the mirror away, cover the reflected face, or choose another photo.
Write down the places that need attention in ordinary terms: “wardrobe mirror,” “window beside my shoulder,” or “small compact on the table.” This helps when the obvious mirror is finished and a second reflection is easy to overlook.
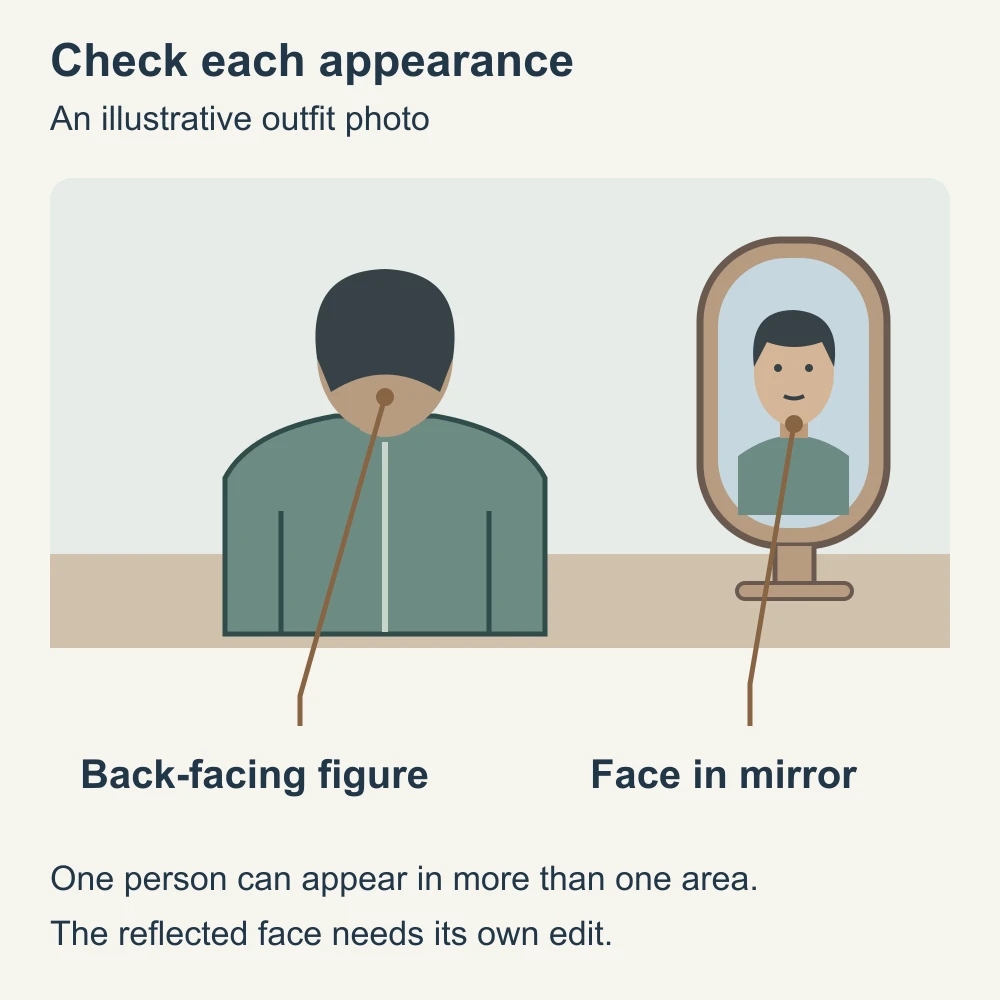
If other people appear, give their reflections the same attention as yours. The multiple-face guide covers agreements and separate treatment for collaborators and bystanders. Here, the task is to finish the reflected areas in a still image.
Choose the edit that keeps the useful photo
Use a crop first when the reflection sits outside the part you want to show. A solid cover is useful when the face sits inside that area and you're comfortable with a visible edit. Retouching can preserve the scene's appearance, but it asks you to judge a more complicated result.
| Where the face appears | Start with | Change approach when |
|---|---|---|
| A small mirror at the edge | Crop out the mirror | The crop removes part of the outfit or demonstration |
| A face inside a mirror you want to keep | Opaque cover over the full reflected face | A visible cover distracts from the subject; consider another shot |
| A dark window behind the subject | Crop or cover the reflected area | The face overlaps the useful action or is hard to distinguish |
| Several overlapping mirror views | Cover the whole unnecessary mirror region | Too little useful picture remains; retake or omit it |
| A reflected person in a polished prop | Set the photo aside and try another angle | The photo is essential and a carefully reviewed repair is practical |
“Opaque” means you can't see through the cover. Choose a filled shape at full opacity, with enough space around the face to include exposed features. An outline around the head leaves the middle visible; a small strip across the eyes leaves the rest of the face.
For this task, a crop or opaque cover is easier to inspect than a faint blur. If you use blur or pixelation, enlarge the saved image and judge the facial detail that remains. The effect's name doesn't tell you whether the result matches what you intended to hide.
You can cover more than the face when the mirror also shows a private photograph or a room you don't want to publish. Keep that choice deliberate: a patch large enough to hide the whole mirror may interfere with the coat, hands or object the audience needs to see. The background-anonymization guide covers those wider environmental decisions.
Crop or cover the reflection with a tool you know
Work on a copy so you can try a crop without losing your private original. Keep the mirror or window on screen while editing, and zoom in before placing a cover. Check all sides of the reflected head, including any profile extending toward a frame or seam.
On iPhone
For a solid cover, open the copy in Photos, choose Edit, then Markup. Tap the Add button, choose Add Shape, and select a rectangle. Set its fill to a solid color at full opacity, move it over the reflection, and resize it to include the whole face with a small margin. Finish with Done and inspect the saved image.
Apple's Markup instructions explain how to enter Markup from Photos. Its shape controls include fill color, opacity and resizing. Check the fill inside the rectangle, rather than only its border. The controls may look different with your software version.
If a rectangle would hide an important hand or garment detail, try a tighter crop or a different photograph. You don't need to force this image to work because it was your favorite take.
On Mac
Open a copy in Preview and show the Markup toolbar. Use a rectangular selection and Crop to keep the needed area, or choose a rectangle from Shapes and set Fill Color to an opaque color. Move and resize the cover over the whole reflected face.
Apple's Preview image tools distinguish the fill inside a shape from its border. After finishing the edit, use File > Export to save a separately named PNG or JPEG, following its image-export instructions. Reopen that file for inspection.
On Android or another image editor
Use your editor's crop or filled-shape tool if it provides one. Photo editors differ, so confirm the fill and opacity on a harmless sample before editing private material. If the available tool only draws thin lines or translucent strokes, move the copy to an editor where you can place a solid cover.
You don't need a tool labeled “reflection remover” to conceal a face. You need control over the specific area and a saved result you can inspect.
Glass-reflection cleanup is a different editing job
A photo taken through a window may contain both the scene beyond the glass and a reflection laid across it. A mirror photo deliberately shows the reflected scene. Those pictures can need different edits, even though both contain reflections.
Adobe describes Photoshop's Reflection Removal as designed for large reflections caused by shooting through glass. Don't interpret that feature name as a promise to conceal a face inside a mirror. If you try it, check what remains visible before using the result.
For a cosmetic repair, decide which complete reflected area you want removed. A tool that clears most of a face but leaves an eye, mouth or recognizable profile hasn't finished your intended edit. Inspect the surrounding mirror edge as well: a broken frame, repeated texture or smeared garment may make the photo unsuitable for the content, even when the facial detail is gone.
If the repair is uncertain, use a solid cover or leave the photo out. A visible edit can be the right choice when its purpose is clear. When showing the untouched scene matters to the claim you're making, choose another image rather than presenting a repaired photo as an unedited record.
Check reflections separately after face anonymization
If you want a visible face in the main composition, the NeoFace face-anonymization workflow describes selecting a synthetic face, uploading a photo or prerecorded video, reviewing the result and downloading it. Start with a clear photo and inspect the processed face before choosing the image for a post.
Then look through every mirror and reflective prop again. A processed foreground face doesn't establish that a reflected face was treated. Don't assume the tool detects each reflection or supports the combination in your photo. Crop or cover a remaining real-face reflection separately, or choose a simpler source image.
If the mirror is the main subject of the photo, such as a mirror selfie, review the visible face in that mirror as the main face. The same rule still applies to a second mirror or shiny object elsewhere in the frame. What matters is each appearance in the finished picture.
Open the finished file and check each version
Save a clearly named finished image, such as coat-photo-reviewed.jpg, and open it outside the editing session. Look at every area on your short reflection list, then scan the picture once more for appearances you missed. Check the image at normal viewing size and zoomed in.
Make sure you're sharing the finished image rather than the original or an editable project. The edited-photo delivery guide explains that file choice. A visible cover in an editing view doesn't establish which file you selected in a sharing app.
Create alternate crops from the reviewed image. If you return to the original to make a square post, that new crop may include the mirror you excluded from the first version. Check each carousel slide independently, because a slight change in pose can move the face or reveal another angle.
A Live Photo needs another choice: whether to send only the still or include surrounding motion and sound. Editing the still is not a review of the whole capture. Use the Live Photo still-sharing guide when you want to publish only one frame.
For your next shoot, remove an unnecessary reflective prop, turn a mirror away or cover it before recording. Check the camera view after each change. The face-free filming guide covers that preparation; it can help you avoid repeating the same repair across a batch.
Before sharing the photo
- Every mirror, window, dark screen and reflective prop has been checked.
- The main face and each reflected appearance follow your intended face choice.
- Each cover is fully opaque and includes the whole area you meant to conceal.
- Crops retain the outfit detail, hands or subject the picture needs to show.
- Any cosmetic repair has been checked for remaining facial detail and damaged surroundings.
- The separately saved image has been reopened, and each carousel slide or alternate crop has its own check.
- The posting preview uses that finished copy; Live Photo motion is included only if you reviewed and intended to share it.
Frequently asked questions
- Is covering my face with a phone enough for a mirror selfie?
- Only if the saved picture shows no facial detail you meant to hide. Check around the phone, other mirrors, windows and shiny objects. A phone that covers your face in the main mirror may leave a side view visible elsewhere. Crop or cover those separate appearances before sharing.
- Does flipping a mirror photo hide my identity?
- No. Flipping changes the direction of the picture. It does not conceal the visible face or other identifying details.
- Will a reflection-removal tool automatically hide a face in a mirror?
- Do not assume it will. A tool for cleaning a picture taken through glass has a different job from concealing a face in a mirror. Inspect the saved result, then crop or cover any reflected facial detail that remains.
- Do I need to check every photo in a mirror-selfie carousel?
- Yes. A different pose or camera angle can show another part of your face or move a reflection outside the cover. Inspect each finished image and its posting crop individually. For a Live Photo, also decide whether to share a still or include the surrounding motion and sound.
Stand out while
staying anonymous.
Join thousands of creators building faceless brands with Neoface. Private by default, lifelike by design.
No credit card required · Instant access · Free plan available
- High-fidelity models
- Private and secure
- 24/7 support