AR Face Filters for Faceless Creators: A Safe Workflow
AR face filters can style faceless creator promos, but they need failure-tolerant capture and frame-by-frame review. Choose, test, and route them safely.
AR face filters can give a faceless creator a recognizable character for short promo clips, but they are creative effects rather than guaranteed anonymity systems. Use them only in a workflow that assumes tracking can fail: choose a failure-tolerant effect, test it on your actual phone and lighting, save the result, and inspect every difficult frame before posting. If one uncovered frame would be unacceptable, choose a method that does not depend on a live AR effect.
This guide owns the cross-platform AR operating question: how to choose, test, record, review, and route face effects without mistaking a fun preview for a privacy control. The broader mask-app guide compares AR effects with face anonymization, blur, and tracked covers. The video-app guide compares editors and post-processing tools. A later Snapchat-specific guide can go deeper on individual Lens workflows without duplicating this platform-neutral process.
What counts as an AR face filter?
“Filter” is the casual name for several different features. The technical category matters because it tells you what the effect follows, what it leaves visible, and how it can fail.
| Effect type | What it does | Useful creator role | Privacy limit |
|---|---|---|---|
| 2D face texture or makeup | Maps color or an image onto facial regions | Graphic makeup, painted character, branded pattern | Often preserves recognizable face shape, eyes, motion, and proportions |
| Landmark-attached sticker | Anchors an image to a point such as the nose or face center | Emoji, visor, logo, small character element | A small sticker can drift or leave most identifying features visible |
| 3D head or face asset | Positions a modeled object relative to the tracked head | Helmet, creature head, large character mask | Coverage depends on the asset, tracking, occlusion design, and camera angle |
| Beauty or reshaping effect | Changes skin, makeup, or facial proportions | Styling and camera polish | Looking different does not mean the person is difficult to recognize |
| Background or portrait segmentation | Separates the person from the scene | Virtual sets, silhouette treatments, environmental privacy | It may protect the room while leaving the face unchanged |
| Full-frame color filter | Changes color, tone, or adds a post-capture overlay | Visual consistency | It does not attach a privacy cover to the face |
Snapchat makes the naming distinction explicit. Its current support page describes Lenses as AR experiences that add effects, objects, characters, and transformations while you capture. Snapchat separately says Filters are post-capture design overlays. If you want a character attached to your face, you are normally evaluating a Lens, even if everyone around you calls it a filter.
TikTok's documentation shows why the effect type matters. As of July 2026, its Face Mask component applies a two-dimensional texture to the whole face or selected regions. Its Face Sticker tool anchors a two-dimensional asset to facial landmarks. Neither definition promises that the person underneath becomes anonymous. They describe how a creative asset is rendered.
When is an AR effect appropriate for a faceless creator?
Start with the consequence of a failure. The same effect can be reasonable for one clip and reckless for another.
Good candidates are short, repeatable promo clips where the visual effect is part of the joke, trend, or character and where you can discard the take. You have time to save the finished clip, inspect it, and shoot again if the effect slips. Your set, voice, account details, and raw files already follow a separate privacy routine.
Poor candidates are live streams, irreplaceable customs, content filmed in a recognizable location, or any post where one clear frame of your real face would cause serious harm. They are also a poor fit when the effect leaves your eyes, jaw, hairline, ears, or facial proportions visible enough that people who know you could recognize you.
Use this routing rule:
| Publishing situation | AR effect role | Better primary control when risk is high |
|---|---|---|
| Short public teaser you can reshoot | Character or style layer after a passed test | Crop or no-face framing if exposure still matters |
| Trend-led TikTok or Reel | Native visual hook | Preprocess the media if the real face must stay private |
| Paid feed video | Optional style, never assumed protection | Reviewed face anonymization or a tracked opaque cover |
| Custom or DM file | Only after the same review as public content | Post-processing with a saved approved export |
| Live stream | Avoid as sole face protection | Physical mask, face outside frame, or no live face camera |
| Profile image | One-frame design option with zoomed review | Face anonymization, crop, or a physical-mask portrait |
The deciding question is simple: if the effect vanished for a fraction of the clip, could you still publish it? If the answer is no, the effect should not be the layer guarding your identity.
Snapchat, TikTok, or Instagram: which AR workflow fits?
The platforms overlap, but each has a different reason to be in your workflow. Feature descriptions below were checked against official documentation in July 2026. Menus and available effects change, so confirm the exact path on your device before a shoot.
Snapchat: character-first Lenses
Snapchat is a practical place to look for a full character, creature, helmet, or stylized face. Face Lenses are selected before capture, and Lens Explorer makes it easy to compare several looks quickly.
The important detail is that Lens behavior varies by how the Lens was built. Snap's developer documentation includes a Face Occlusion component designed to keep a face effect from rendering over an object such as a hand. That can make an effect look more realistic. It does not mean every Lens uses the component or that occlusion handling protects your identity. Test the chosen Lens rather than transferring confidence from one Lens to another.
Use Snapchat when the character is the creative idea. Keep the upcoming Snapchat-specific queue topic narrow by treating this section as platform selection, not a claim that any particular Lens is safe enough for private paid media.
TikTok: trend-native face effects
TikTok fits when the effect and the distribution format belong together. Face masks, landmark stickers, three-dimensional head elements, and transformations can become part of the hook instead of looking imported from another app.
Current Effect House documentation exposes two useful cautions. First, the Face Mask component's optional occlusion behavior can make selected regions of an effect invisible when something covers the face. That may be correct for a realistic makeup effect, but disappearing is the opposite of what you want from a sole privacy cover. Second, TikTok recommends creators test effect performance and notes that complex projects or low-end devices can reduce frame rate. Your privacy review therefore belongs on the actual recording phone, not only on an effect demo.
Use TikTok when a trend-native effect is the point and the clip is replaceable. Save a creator-safe result when the app and account workflow allow it, then move the file through the same review gate as media made elsewhere.
Instagram: convenient Reel effects
Meta's current Instagram Reel instructions include a camera-effects control while recording. That makes Instagram convenient when the entire Reel is being assembled in the app.
Convenience can compress the review window. A fast record-preview-post sequence encourages you to judge the clip at playback speed instead of pausing on the difficult moments. Keep it in drafts until the effect, cover frame, audio, caption, and account identity have passed review.
If you expect to promote the Reel as an ad, check eligibility before building a campaign around the effect. Meta's current Reel boosting guidance says some Reels using third-party camera filters cannot be boosted. Organic styling and paid amplification are separate decisions.
Choose an effect that fails safely
An effect can be visually impressive and still have a bad failure shape. Evaluate the design before you test the tracker.
Prefer generous coverage
A tiny sticker centered between the eyes may follow perfectly and still expose the rest of the face. For a privacy-minded character, inspect coverage at the widest smile, the sharpest side angle, and the closest camera distance. Look at the full identifying region: eyes, nose, mouth, cheeks, jaw, ears, hairline, and face shape.
Large coverage is not automatically safe. A transparent texture, open eye area, narrow half-mask, or modeled helmet with a wide visor can preserve a recognizable person. The mask, crop, and blur comparison helps separate visual drama from actual coverage.
Avoid identity-preserving beauty effects
Makeup, smoothing, eye color, contour, and mild reshaping can create a different mood while leaving the person easy to recognize. Ask two people who know you to view a still without context. If they recognize you immediately, the effect is styling.
Do not respond by stacking effects until the preview looks unfamiliar. More rendering work can create a less predictable pipeline, and a dramatic transformation may still preserve useful identifying structure. Change methods when the privacy goal is stronger than the effect can support.
Pick a repeatable character
If the AR look is part of the public persona, write a short specification:
- Effect or character name and a screenshot of the approved version
- Primary and backup platform
- Phone model and camera orientation
- Lighting position and background
- Face coverage rule
- Color, makeup, hair, and wardrobe rules
- Approved voice policy
- Fallback when the effect is unavailable
Effect availability can change. A persona that depends on one discoverable effect needs a backup look or a different method that you control. Save reference frames for the audience-facing design, never raw frames containing your real face.
Run a break test before recording real content
A straight-on preview in bright light proves very little. Build a short clip that concentrates the conditions most likely to challenge the effect.
Record 30 to 45 seconds with this sequence:
- Hold still, facing forward, for two seconds.
- Turn slowly to a three-quarter view on both sides.
- Turn quickly left and right.
- Look up and down while talking.
- Smile widely and open your mouth.
- Pass a hand in front of the eyes, nose, and mouth.
- Let hair or clothing cross part of the face.
- Move close to the camera, then several steps back.
- Leave the frame partly, return, then leave completely and return.
- Repeat one turn in your normal low, colored, or backlit setup.
- Add a second person only if collaborators appear in the real format.
- Include a mirror, window, or screen if the actual set contains one.
Use the same device, effect version, camera, lighting, and recording mode planned for the post. A test on a newer phone tells you little about the creator phone that will do the rendering. Repeat the test after a major app update, an operating-system update, a device change, or a material change in the effect.
Review the saved clip instead of trusting the preview
The recording preview is a performance view. Your review needs to be a privacy view.
Move the saved result into a player that lets you pause precisely or step through frames. If the platform does not give you a saved file you can inspect, do not use that workflow as the only protection for sensitive content.
Check the clip in this order:
- First frame before the effect fully settles
- Last frame after movement stops
- Every fast head turn
- The moment a hand, hair, prop, or clothing crosses the face
- The move toward and away from the camera
- Partial exit, full exit, and re-entry
- Eyes, mouth, jaw, ears, and hairline at the widest angle
- Any moment the effect freezes, jumps, disappears, or changes scale
- Mirrors, windows, screens, thumbnails, and secondary faces
- Cover image, preview tile, and scrubber thumbnails
- Audio for names, real voice, notifications, and location clues
- Caption, username, tags, and selected posting account
- The uploaded copy after platform compression
Normal-speed playback comes last. It tells you whether the clip feels good after the privacy check has already passed. It cannot replace the frame review.
Build a raw, review, and approved file path
An AR effect does not prevent an original from being posted by mistake. Treat file handling as part of the method.
Create three clear states:
- Raw: anything containing your uncovered face or an unverified live effect. Never post from this folder.
- Review: saved AR clips waiting for frame, audio, metadata, and account checks.
- Approved: the only files visible in your posting routine.
Use filenames that make the state obvious at a glance. Keep personal photos out of the creator device's upload picker where possible. Remove failed takes instead of leaving an uncovered clip beside an approved one with an almost identical thumbnail.
The broader OnlyFans anonymity checklist covers account separation, contacts, metadata, backgrounds, voice, and recurring audits. An effect addresses only the visible face layer.
Know when to switch methods
Stop trying to rescue an AR workflow when:
- The effect leaves recognizable features exposed by design.
- It slips more than once in the stress clip.
- You cannot save a reviewable output.
- The phone drops frames or heats enough to change performance.
- The effect is unavailable on your backup device or account.
- A custom, paid post, or live session cannot tolerate a failure.
- The character needs a consistent natural-looking face across many shoots.
- Manual review takes longer than a post-processing method would.
For a live session, choose protection present in the camera input: a physical mask or no-face framing. The physical-mask guide covers fit, visibility, heat, speech, movement, and shoot testing.
For prerecorded media where you want a visible face, use a face anonymization workflow that produces a file you can review before posting. With NeoFace as the worked example, the current face anonymization walkthrough shows upload, face detection, anonymized output, and review. Inspect the processed result with the same care as an AR clip.
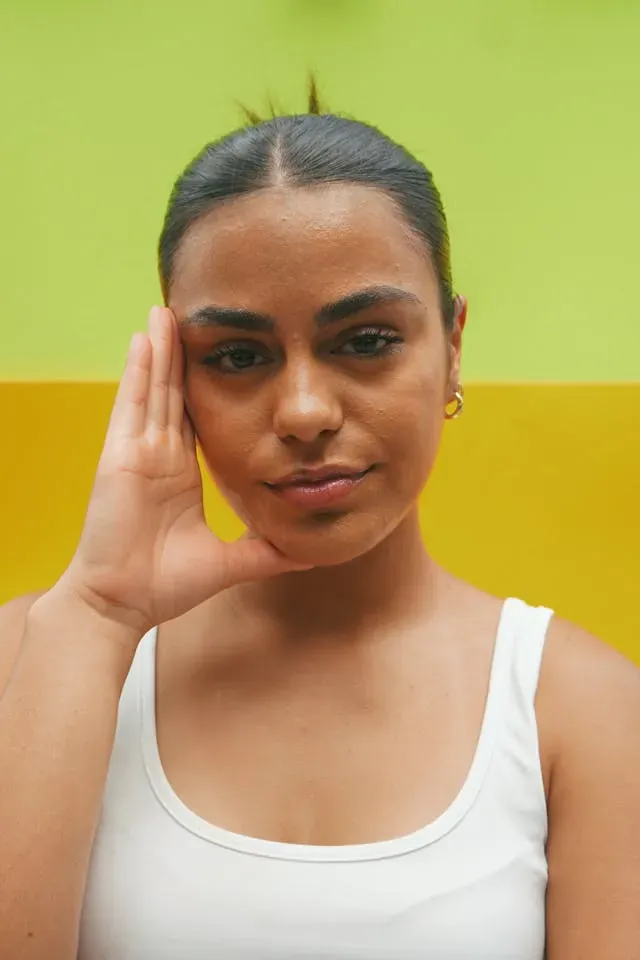
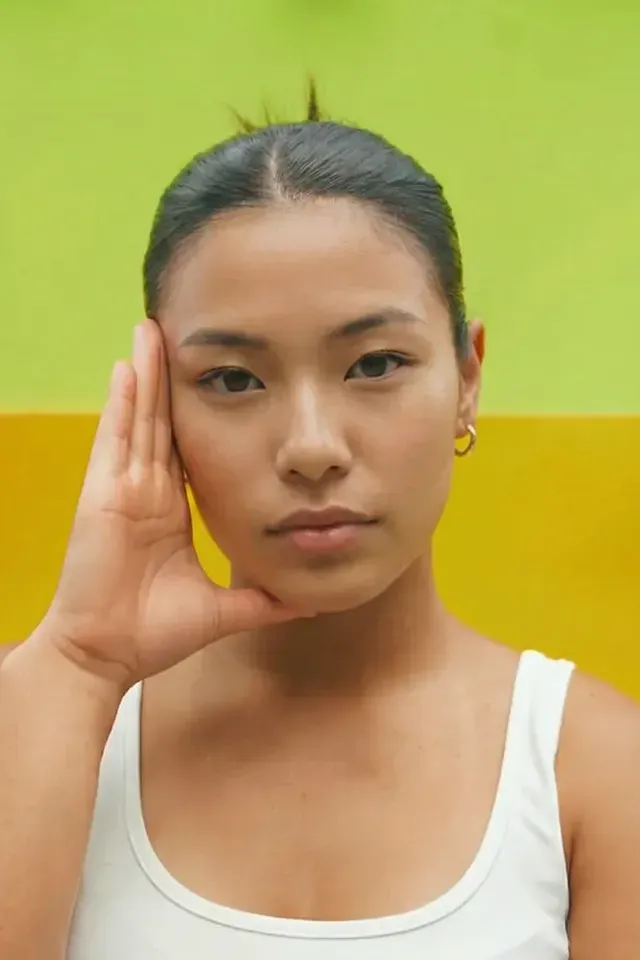
Face anonymization is still one layer. It does not clean the background, change the voice, separate accounts, or stop the wrong file from being selected.
The AR face-filter publishing checklist
Use this list for every AR-filter post, even after the setup has passed an earlier test:
- The clip can tolerate an effect failure without unacceptable harm.
- The effect type and coverage are understood.
- The exact effect was tested on the recording phone.
- Current lighting, camera distance, and movement passed the break test.
- The finished clip was saved outside the live preview.
- First, last, turn, occlusion, distance, and re-entry frames passed.
- Eyes, jaw, ears, hairline, and facial proportions are covered to policy.
- Reflections, screens, second faces, and thumbnails passed.
- The visible character matches the persona specification.
- Voice and background audio follow the account policy.
- No raw file sits beside the approved export in the upload picker.
- The caption and posting account contain no personal identity bridge.
- The compressed or draft upload was reviewed before public release.
- A backup method is ready if the effect is unavailable.
- Paid, custom, permanent, and live content use the higher-risk route.
Where AR filters belong in a faceless workflow
AR filters are useful when the effect itself is the creative idea and the recording is replaceable. Snapchat can supply character-focused Lenses, TikTok can keep a promo native to a trend, and Instagram can make an in-app Reel convenient. None of those roles turns a creative effect into a guarantee that your real face cannot appear.
Define the consequence of failure before choosing the effect. Test the exact combination of effect, phone, lighting, motion, and platform. Review the saved result frame by frame and keep only approved files in the posting path. When an exposed frame would be unacceptable, move to capture-time coverage or reviewed post-processing instead of asking an entertainment effect to carry the whole privacy plan.
Frequently asked questions
- Can AR face filters keep a creator anonymous?
- An AR face filter can cover or transform visible features, but it should not be treated as an anonymity guarantee. The effect depends on face tracking, rendering, the chosen design, and the recording device. Use it only when you can save and inspect the finished file and when one uncovered frame would not create an unacceptable privacy loss.
- Which app has the best AR face filters for faceless creators?
- Snapchat is a strong starting point for character-style Lenses, TikTok is useful for trend-native face effects, and Instagram is convenient for Reels made inside the app. The best choice depends on the effect, device, export path, and where the clip will live. Test the exact effect on the exact phone instead of choosing a platform by reputation.
- Is a Snapchat Lens the same as a Snapchat Filter?
- No. Snapchat says Lenses are augmented-reality experiences used while capturing a Snap, including face transformations, objects, and characters. Filters are overlays added after capture, such as color treatments or venue information. For a face-attached character or mask, you are usually looking for a Lens rather than a Filter.
- What happens when an AR face effect loses tracking?
- The visible result depends on how the effect was built. It may drift, misalign, freeze, disappear, or recover after the face returns to a trackable position. Some effects include occlusion handling, while others do not. Record head turns, hand crossings, distance changes, and exits from frame, then inspect each stress point in the saved clip.
- Can I use an AR filter on paid creator content?
- You can use one as a deliberate visual style, but the privacy threshold should be higher for paid, custom, or permanent content. If an exposed frame would be damaging, an entertainment effect is the wrong sole control. Use face anonymization, a tracked opaque cover, a physical mask, or no-face framing, then review the complete export before delivery.
- How do I test an AR face filter before posting?
- Make a short test with fast and slow head turns, talking, hair or a hand crossing the face, low light, backlight, distance changes, and a brief exit from frame. Save the result, inspect the first and last frames, step through each difficult moment, check reflections and thumbnails, and review the platform-compressed copy before publishing.
- What should I use if one uncovered frame is unacceptable?
- Choose a method whose protection does not depend on a live entertainment effect. Keep the face outside the frame, wear a physical cover during capture, add a generous tracked cover in post, or use a reviewed face anonymization workflow for prerecorded media. Live content needs capture-time protection because there is no private frame-by-frame review before viewers see it.
Stand Out While Staying Anonymous
Join thousands of creators building faceless brands with Neoface. Private by default, lifelike by design.
No credit card required · Instant access · Free plan available