Faceless OnlyFans Profile Photos & Banners
Plan privacy-safe OnlyFans profile photos and banners that stay recognizable across crops, match your persona, and pass a complete identity-leak review.
A faceless OnlyFans profile photo and banner should make your creator persona easy to recognize without publishing an identity clue you meant to keep private. Give the profile image one bold, readable cue, use the banner to establish the wider visual world, and test both in the actual crops viewers will see. The safest pair follows the same face rule as your content and comes from a creator-only asset workflow.
This guide owns the profile-photo and banner production system: what each asset must do, how to compose it, how to route face visibility, how to test crops, and how to approve a coordinated set. The broader faceless OnlyFans guide remains the owner of the end-to-end account and content strategy. The stage-name guide owns naming and handle selection. Here, the job is to turn that persona into two durable visual assets.
Give the profile photo and banner different jobs
Treating the banner as a stretched profile picture wastes the larger surface. The two images should look related, but they solve different problems.
The profile photo is an identity token. It appears small, may be cropped tightly, and needs to remain understandable without text or fine detail. A viewer should be able to recognize it by shape, color, face treatment, mask, prop, or silhouette.
The banner is the setting. It can show more of the palette, wardrobe, pose, texture, or set design. It can explain the account's mood without trying to fit the whole offer into a graphic. Its main subject still needs enough room to survive a wide crop and interface overlays.
| Asset | Primary job | What must survive | Common failure |
|---|---|---|---|
| Profile photo | Identify the persona quickly | One bold shape, face rule, and high-contrast color relationship | Tiny details disappear or the crop cuts through the subject |
| Banner | Establish the visual world | Palette, composition, mood, and one supporting cue | Important content sits at an edge or text becomes unreadable |
| Pinned preview | Explain what the account offers | Clear format, boundary, and posting expectation | It repeats the banner without adding useful information |
| Promo avatar | Connect outside traffic to the paid page | Same persona and visual family | It reuses a personal image or shows a different face rule |
Write one sentence for each asset before opening a camera or design app. For example: “The profile image is a violet masked portrait that reads at thumbnail size.” Then: “The banner shows the same mask, violet light, and silver fabric in a wider waist-up composition.”
Those sentences keep the shoot focused. They also make approval easier because you can judge whether each file performs its assigned job instead of choosing whichever shot feels most polished in isolation.
Choose the face rule before the art direction
Your profile media should not become an exception to the privacy rule used everywhere else. A single real-face avatar can defeat months of careful cropping in paid posts.
Choose one route from this table:
| Face route | Profile-photo approach | Banner approach | Main review concern |
|---|---|---|---|
| No face recorded | Prop, hands, silhouette, back-of-head, or controlled body crop | Wider scene using the same crop boundary | Mirrors, screens, shadows, and accidental facial edges |
| Opaque physical covering | Close portrait with the approved mask, hood, or helmet | Wider pose that shows the costume system | Eye openings, loose edges, distinctive hair, and skin details |
| Partial styling accepted | Character makeup, veil, glasses, or partial mask | Matching styling with a wider composition | Familiar viewers may still recognize the real face |
| Reviewed face anonymization | Clear anonymized portrait with one reusable synthetic face | Separately processed and reviewed wide image | Wrong persona, incomplete processing, crop, or raw-file mix-up |
| Abstract identity | Monogram, illustration, prop, texture, or simple mark | Photographic or graphic environment built from the same palette | Generic result that has no connection to the content |
If recognition would create serious personal, work, housing, relationship, custody, or safety consequences, do not use styling as proof of anonymity. Makeup, a wig, colored light, and a partial veil can change presentation while leaving the face available to people who know it.
Use the mask, crop, blur, and face-anonymization comparison if the face method is still undecided. Finish that decision first. Art direction becomes much simpler when the privacy boundary is fixed.
Build a one-page visual brief
A profile pair looks intentional when it repeats a limited set of choices. You do not need a full brand manual. You need enough written direction to prevent a random favorite photo from becoming the permanent account image.
Record these fields in a creator-only note:
- Persona name and face rule: the approved public name and exactly what may appear around the face.
- Primary cue: one mask shape, anonymized face, prop, silhouette, hairstyle, hand pose, or graphic mark.
- Palette: one dominant color, one supporting color, and a neutral.
- Lighting: soft or hard, bright or low-key, neutral or colored, with a repeatable setup.
- Background: plain paper, fabric, wall, constructed set, or a graphic field that carries no personal location clues.
- Wardrobe and texture: the one or two materials that connect the avatar and banner.
- Crop rule: how close the profile image may go and where the banner subject sits.
- Forbidden details: real face, personal jewelry, tattoos, room features, reflections, mail, screens, labels, or anything else outside the boundary.
Add two reference frames made specifically for the creator identity. Do not copy screenshots from personal profiles into the brief. Even if a personal image never gets published, moving it into creator folders creates a wrong-account risk later.
Keep the system flexible enough for a future refresh. A whole brand built around one holiday costume or one room becomes expensive to maintain. A palette, face rule, lighting pattern, and primary cue can survive new sets and formats.
How to shoot a faceless profile photo
Start with the smallest surface. If the idea works as a tiny profile image, it will usually scale up. The reverse is not true.
Choose one readable subject
Use one dominant subject with clear edges. A masked face, an anonymized portrait, a backlit silhouette, gloved hands around a signature prop, or a simple shoulder-and-hair crop can work. Three props, layered text, a detailed room, and a complicated pose will merge into noise at thumbnail size.
Set the camera far enough back to leave crop room around the subject. You can tighten the final image later. A source photographed too close gives the editor no safe alternative when it applies a different crop.
Separate the subject from the background
Create contrast with value, color, focus, or light. A dark hood against a black wall may preserve privacy but disappear visually. A light edge behind the hood, a contrasting background, or a controlled shoulder highlight can restore the shape without exposing more identity.
Avoid personal rooms when a plain backdrop will do. A bedroom corner can reveal furniture, window placement, bedding, artwork, or reflections that somebody recognizes. A portable fabric, paper roll, blank wall, or purpose-built panel is easier to review and recreate.
Test expressions and angles only when a face is visible
For a physical mask or anonymized face, make a small contact sheet of front, three-quarter, and slight profile options. Include neutral and warm expressions when the method preserves facial expression. Choose the image that reads clearly at small size, not the one that looks best only when enlarged.
If a partial mask, glasses, makeup, or veil leaves real features visible, review the eyes, ears, hairline, teeth, jaw, and profile separately. Familiar recognition is different from a stranger failing to name you. Your privacy decision must account for the people most likely to recognize those features.
Preview the actual thumbnail
Export several square candidates with extra space around the subject. Upload one as a test and inspect every profile-photo rendering you can reach on phone and desktop. Look for unexpected circular or rounded crops, edge loss, low contrast, and any face detail enlarged by the final framing.
Do not approve the full-size source and assume the thumbnail follows. Approval belongs to the delivered crop.
How to compose a faceless banner
The banner needs a wide composition from the start. Cropping the top and bottom from a portrait often leaves an awkward torso, cuts off the mask, or magnifies background clues.
Put the important subject away from the edges
Leave generous negative space on both sides and above and below the main cue. Keep essential facial coverage, props, hands, and text away from boundaries. The live editor may show a different portion of the source across devices, and interface elements can cover part of the visible image.
If you add words, keep them short and make a second version without text. The stage name may already appear next to the image, and a detailed offer belongs in the bio or pinned post. Small text is also the first element to fail when a wide banner is reduced.
Show a wider version of the same persona
Repeat the profile image's palette, mask or face treatment, and lighting. Change the composition rather than the identity. The banner might show more wardrobe, a wider silhouette, hands interacting with a prop, or a controlled slice of the set.
Do not introduce a second face treatment just because the banner is larger. A cropped avatar paired with a real-face banner is a privacy failure. An anonymized avatar paired with a different synthetic face in the banner looks like two different people. A physical-mask avatar paired with an unmasked profile header weakens the rule viewers were taught.
Inspect the whole environment
Wide frames collect more clues. Check every corner for doors, window views, mail, packaging, medication labels, work equipment, school material, calendars, mirrors, screens, framed photographs, car details, and unique architecture.
Review skin and wardrobe too. Tattoos, scars, birthmarks, distinctive piercings, custom jewelry, uniforms, and one-of-a-kind clothing can connect accounts without a face. Cover, crop, edit, or accept each detail deliberately.
Use face anonymization for a face-forward profile pair
If the persona needs a visible face but the real face cannot appear, create the source photo as carefully as you would any portrait, then anonymize each approved candidate before it enters the profile-asset folder.
The current NeoFace face anonymization walkthrough shows the product flow: create and select a reusable synthetic face, upload a clear photo or prerecorded video, review the processed result, and download the version you want to publish. Use one active NeoFace for both assets so the account presents one person.
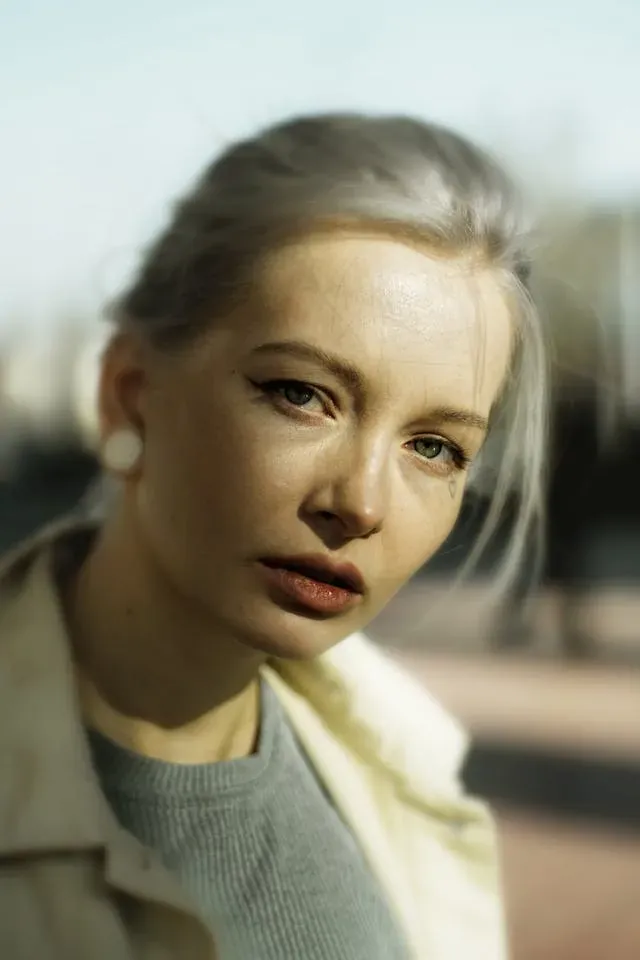
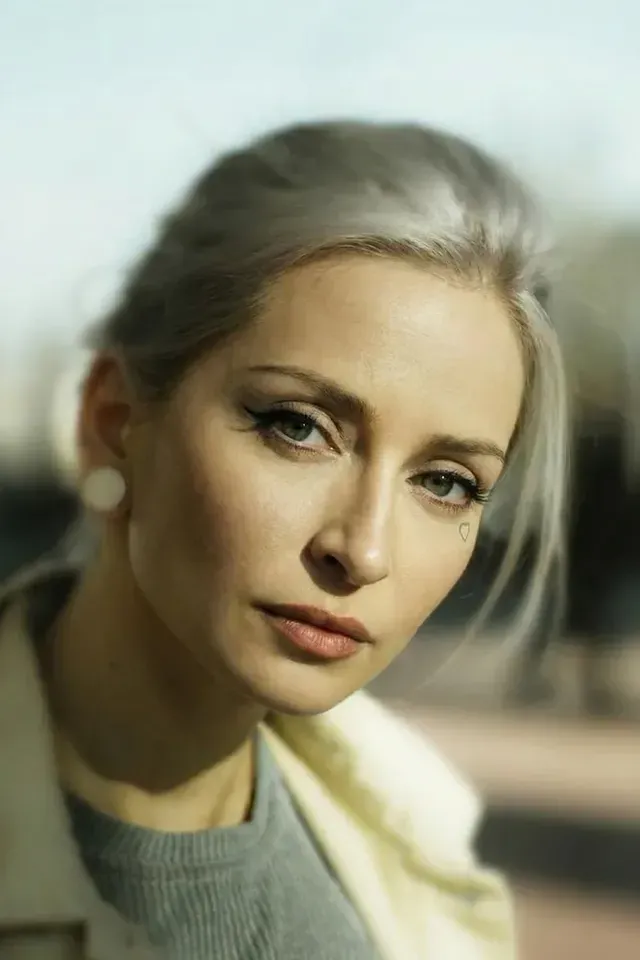
Process the profile and banner candidates separately because crop, angle, face size, and lighting can change how each output looks. Compare eyes, mouth, jawline, hairline, skin edges, earrings, and any place where hair or a hand crosses the face. Reject a result with an unstable edge or an unintended identity change. Do not repair it by hiding the flaw at thumbnail size.
Keep source, processed, cropped, and approved files in different folders. Only the approved folder should be available to the browser or device used to update the profile.
Face anonymization protects the face in the reviewed output. It does not remove tattoos, background details, reflections, metadata, reused filenames, or connections between personal and creator accounts. Those require their own review.
Build creator-only exports instead of reusing personal files
Never turn a personal profile photo into a creator asset by cropping it, tinting it, adding a mask graphic, or removing the face. The source can still be matched by background, pose, clothing, object placement, or the unchanged parts of the image.
Shoot a new creator-only source. Then create separate exports for:
- OnlyFans profile image.
- OnlyFans banner.
- Main promo-platform avatar.
- Link-page thumbnail, if you use one.
- A private archive master that never enters an upload picker.
Keep the persona consistent across creator surfaces, but do not use the identical file for every crop. A shared palette and subject are enough to connect the brand. Platform-specific exports reduce awkward cropping and keep one exact image from becoming the universal key to every creator profile.
Use plain filenames that reveal nothing personal. A structure such as violet-profile-v2-approved.webp and violet-banner-v2-approved.webp is useful. Real initials, birth years, client names, hometowns, phone numbers, or camera-roll defaults do not belong in publishable filenames.
Remove file and account clues before upload
Visual approval is only one gate. The EXIF removal guide covers how to inspect and remove location, device, timestamp, and other metadata from image and video files on common devices.
For the profile pair, run this compact file workflow:
- Copy only selected source files into the creator workspace.
- Edit and anonymize within that workspace.
- Export fresh platform-specific files with neutral names.
- Inspect the exported metadata rather than assuming the editor removed it.
- Open the final files and check that they still render correctly.
- Move only approved exports to the upload device or browser session.
- Keep raw sources away from the upload picker and synced personal albums.
Then check the account context. Confirm the browser profile, email, password manager entry, download folder, and posting account all belong to the creator identity. A perfect banner uploaded from the wrong account can expose more than a weak crop.
The broader OnlyFans anonymity checklist covers account separation, contact discovery, visual clues, voice, metadata, and ongoing audits. Profile media should pass inside that larger system.
Run a crop and recognition test
Do not judge the files only in the editor. Test how they behave as an actual pair.
Make a crop sheet
Save a private review page containing:
- The full profile-image source.
- The exported square profile candidate.
- A small thumbnail preview.
- The full banner source.
- The exported wide candidate.
- Phone and desktop screenshots of the live previews.
Mark the parts that must remain visible and the parts that must never appear. If the face rule depends on a crop edge, add more safety margin or reshoot. A narrow crop that hides the real face by a few pixels is fragile.
Ask recognition questions, not beauty questions
For each preview, ask:
- Would a stranger understand that these two assets belong to the same persona?
- Would a friend, coworker, former partner, or neighbor recognize the subject, room, clothing, or prop?
- Does the profile image remain clear when reduced?
- Does the banner still work when its top, bottom, or sides are trimmed?
- Is the same face rule visible in both assets?
- Can any text be read without zooming, and is that text necessary?
- Does either image reuse a personal pose, set, photo, or distinctive item?
Use a trusted reviewer only if that person can see the material safely and does not know personal details that would create a new exposure path. Otherwise, perform a delayed second review yourself. Step away from the files, return later, and inspect them from the perspective of someone looking for clues.
Score the pair before choosing
When several images look good, use a simple score instead of changing your mind based on which file is currently open.
| Criterion | Profile photo question | Banner question | Weight |
|---|---|---|---|
| Privacy | Does the final crop follow the written face and identity boundary? | Does the wider frame reveal any extra clue? | 5 |
| Recognition | Is one persona cue obvious at thumbnail size? | Does the same cue survive the wide crop? | 4 |
| Consistency | Does it match the stage name, palette, and content style? | Does it look like the same account world? | 4 |
| Crop resilience | Is there comfortable space around the subject? | Can edges move without breaking the image? | 4 |
| Simplicity | Is the image readable without tiny details or text? | Does the larger scene remain focused? | 3 |
| Repeatability | Can you recreate this look for future posts or refreshes? | Can you extend the setting without exposing a real location? | 3 |
Score each criterion from one to five, then multiply by the weight. Privacy is a veto, not a tradeoff. A visually strong file that fails the identity boundary is out regardless of its total.
Keep the score sheet with the visual brief. When you refresh the account later, it will show what the previous pair was designed to do and which weaknesses you were trying to avoid.
Launch the pair as one controlled change
Update the profile photo and banner in the same session. If the face rule or visual identity has changed, update closely related public assets at the same time so viewers do not see competing personas.
Use this order:
- Finish and approve all replacements before changing anything live.
- Save screenshots of the old public profile for your private archive.
- Confirm you are in the creator account and the correct browser profile.
- Upload the new profile image and inspect every available crop preview.
- Upload the new banner and inspect phone and desktop views.
- Review the combined page for mismatched color, face treatment, text, and positioning.
- Check the bio, pinned preview, watermark, and active promo avatars for an outdated persona.
- Save screenshots of the new profile at each tested width.
- Move rejected and obsolete files out of the upload folder.
- Repeat the public identity review after the page has been live long enough for you to see it with fresh eyes.
Do not use an unplanned changeover to explain private details. If the reason is a stronger privacy boundary, present the new art as a normal visual refresh. You do not owe viewers a map of what the old assets exposed.
Common profile-photo and banner mistakes
Using the same composition twice. A banner needs a wider scene and more crop room. Stretching or heavily cropping the avatar wastes the second surface.
Choosing by full-size beauty alone. Fine makeup, small props, and detailed typography may vanish in a profile thumbnail. Approve the delivered size.
Letting the profile pair break the content rule. The account is not faceless if the avatar or banner publishes the real face. Apply the same rule to every visible asset.
Reusing a personal photo. Cropping, tinting, or covering part of a known image does not erase the unchanged background, pose, clothing, or source match.
Trusting old dimension advice. Interfaces change, and third-party articles go stale. Build high-quality square and wide masters, then approve the current live crops.
Putting critical details at the edge. Faces, masks, props, text, and hands need room around them. Edge-dependent privacy is especially fragile.
Filling the banner with small text. Use the visual to establish tone. Put detailed promises, schedules, and boundaries in fields designed for readable copy.
Mixing synthetic identities. If you use face anonymization, one reusable face should define the persona. A different face in each asset looks like a different subject.
Keeping raw and approved files together. Similar thumbnails make mistakes easy. Separate file states and restrict the upload workflow to approved exports.
Ignoring the wider background. A banner can reveal far more room, location, body, wardrobe, and reflection detail than a tight profile image.
Faceless profile-media checklist
Complete this before launch and after every meaningful refresh:
- The profile photo and banner have separate written jobs.
- The persona name, face rule, palette, primary cue, lighting, and background are documented.
- Both assets follow the same face and identity boundary as paid content and promos.
- No source image came from a personal account, album, dating profile, portfolio, or old avatar.
- Profile source has enough room for current thumbnail crops.
- Banner source was composed wide and keeps important details away from every edge.
- The main cue remains readable at the smallest tested profile size.
- Phone and desktop previews were checked in the current live editor.
- Profile and banner look like the same persona without being duplicate crops.
- Any physical mask, hood, veil, glasses, or styling follows the approved coverage rule.
- Any anonymized face matches the active synthetic persona and passed a full-size review.
- Face, hairline, ears, eyes, teeth, jaw, and profile were checked according to the boundary.
- Tattoos, scars, birthmarks, jewelry, nails, clothing, and props were reviewed.
- Mirrors, screens, windows, shadows, mail, labels, room details, and landmarks were reviewed.
- Exported metadata was inspected and removed where needed.
- Filenames contain no real initials, names, dates, locations, or personal identifiers.
- Creator-only exports were made for each platform crop.
- Raw, processed, cropped, rejected, and approved files are separated.
- The upload browser, account, password entry, and folder all belong to the creator identity.
- Bio, pinned preview, watermark, link-page thumbnail, and promo avatars were checked for an old persona.
- Rejected and obsolete assets were removed from the upload location.
- Screenshots of the approved live profile were saved for the next audit.
Any unresolved privacy item is a stop signal. Change the crop, remove the detail, reshoot on a controlled background, use a stronger face method, or leave the asset unpublished.
Make the pair easy to recognize and safe to repeat
The strongest faceless profile pair is simple enough to recognize at a glance and documented well enough to recreate months later. The profile photo carries one bold identity cue. The banner expands the palette and setting. Both use the same face rule, avoid personal source material, survive current crops, and move through a creator-only approval path.
Start with the privacy boundary, then build the visual system around it. Shoot separate square and wide sources, review the complete frame, test the actual platform previews, and update the pair together. A controlled workflow gives the account a clear public identity without turning the profile itself into the easiest route back to your private one.
Frequently asked questions
- What should I use as an OnlyFans profile picture if I am faceless?
- Use one clear persona cue that still works at thumbnail size: a physical mask portrait, an anonymized face, a tightly framed detail, a silhouette, or a simple character mark. Keep the background quiet and the contrast strong. The image should follow the same face rule as your paid content and reveal no reused personal photo, room detail, tattoo, reflection, or account clue.
- Does a faceless OnlyFans profile photo need to show a face?
- No. A face can make a persona easier to recognize, but a distinctive crop, mask, silhouette, prop, color block, or monogram can do the same branding job. Choose based on your privacy boundary and content style. If a visible face would create unacceptable risk, do not weaken the boundary just to make the profile image look conventional.
- How do I make an OnlyFans banner without revealing my identity?
- Build the banner from approved creator-only assets. Use a wide composition with the subject or main prop away from likely crop edges, a plain or purpose-built background, and no personal room details, mirrors, mail, screens, landmarks, tattoos, or reused social images. Upload a test, inspect the live crop on phone and desktop, then review the saved asset again before launch.
- What size should an OnlyFans profile photo and banner be?
- Do not rely on an old dimension copied from a third-party article. Export a high-quality square master for the profile image and a wide master for the banner, then use the current OnlyFans editor preview as the final authority. Check every visible crop on phone and desktop. Keep important features away from edges so later interface changes do not cut through the subject or text.
- Should I use the same profile image on OnlyFans and social media?
- Keep the same persona, palette, styling, and face rule across creator accounts, but export platform-specific crops instead of reusing one exact file everywhere. Never reuse an image from a personal account. Separate exports let you fit each surface, remove hidden metadata, and avoid turning one reverse-image match into an easy bridge across every creator profile.
- Can I blur my face in an OnlyFans profile picture?
- You can, but a small blurred face often looks accidental and gives you little visual identity. A deliberate no-face crop, opaque physical mask, silhouette, or reviewed face anonymization usually creates a cleaner profile asset. If blur is your chosen rule, make it strong enough to remove identifying detail, cover the full identifying region, and inspect the final thumbnail after upload.
- Can NeoFace make a faceless creator profile photo?
- NeoFace can anonymize a clear source photo with a reusable synthetic face. Use a non-sensitive test first, choose the active NeoFace you want for the persona, review the processed face at full size, and download only an output that passes. The finished profile image still needs separate checks for background clues, tattoos, reflections, metadata, crop behavior, and consistency with your other approved assets.
Stand Out While Staying Anonymous
Join thousands of creators building faceless brands with Neoface. Private by default, lifelike by design.
No credit card required · Instant access · Free plan available